Mini Speed Hump

SKU: RR-07MHVY Categories: ,

Description

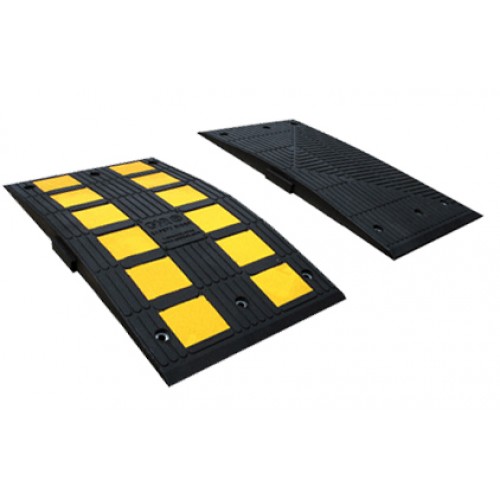
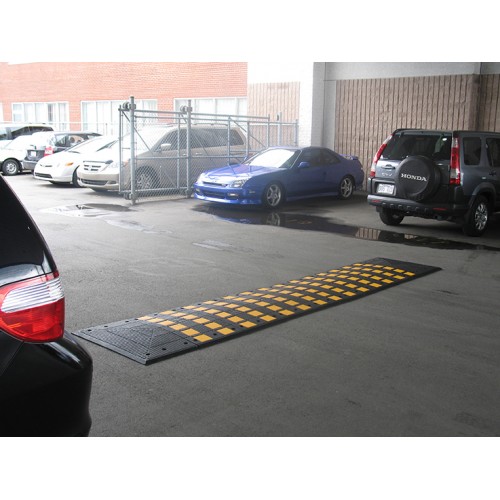
The Safety Rider® rubber mini hump is a unique modular traffic calming device designed to slow traffic while maintaining a continuous traffic flow. The mini hump is constructed of interlocking units with a tongue and groove system. This allows the humps to be linked together to cover the width of any roadway. End caps are available to provide a smooth finish to the ends of the hump.

Features

The Safety Rider® is constructed from 100% recycled tires. Unlike asphalt humps, our mini humps are preformed for a uniform and consistent profile and a smooth, safe ride. The mini humps are simple to install and do not require road closures. Plastic shields are inserted into pre-drilled holes and the units are bolted down to keep from shifting. The Safety Rider® can be easily removed for storage or relocation.

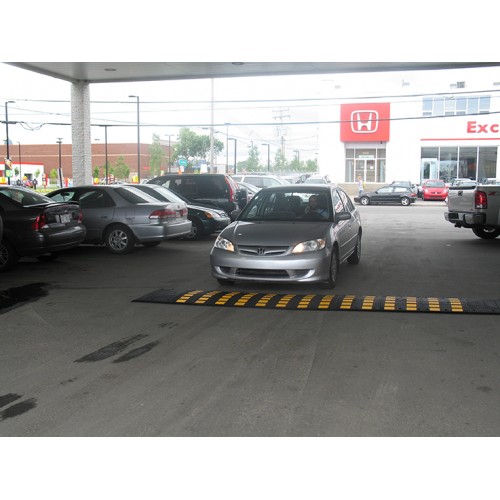
Mini speed humps are ideal for slowing traffic in school parking lots and crossings, playground areas, hospitals, parking facilities, and anywhere a slow traffic flow is required. Heavy load bearing truck traffic is ideally facilitated by the Safety Rider® mini hump.

Molded highly reflective tape provides optimal visibility even on a dark night, alerting drivers well in advance.

Safety Rider® mini humps are covered by a 3 year warranty; 1 year on the tape (under normal use).

Technical Specs

Technical Specs

General description:

Safety Rider® mini humps of required lengths are constructed using the interlocking middle and the end cap modules. The standard foot print dimensions of each module are 35.5″ by 19.5″. The end caps are with the similar footprint as the middle modules. The weight of the middle modules is 36 lbs each, the end cap modules weights 33 lbs. Each unit is bolted to a paved road surface using six lag bolts 3/8″ dia. through a plastic shield installed in the road surface.

Dimensions of the modules:

  • width 35.5″ (+/- 1/16″)
  • length 19.5 (+/- 1/8″)
  • thickness 2.1″ (+/- 1/8″)

Material

Compression molded 100% recycled rubber and polyurethane composite

Physical properties:

  • tensile strength: minimum 500 psii
  • shore hardness: minimum 70A
  • specific gravity 1.1-1.5

Marking:

Rubber modules are available in black with yellow or white in-molded reflective tape

Warranty

3 years on the rubber; 1 year on the tape (under normal use) installed as per the manufacturer’s installation instructions.

Installation Instructions

Installation Guide

Components

  • Mini Hump unit sections
  • Lag bolts 3/8″ diameter, 4″ long – 6 per section (included)
  • Plastic shields (anchors), 9/16″ diameter 3″ long – 6 per section (included)
  • Zinc plated steel washers – 6 per section (included)
Installations Tools
  • Chalk
  • Measuring tape
  • Heavy duty hammer drill
  • Drill bits – carbide tip, 9/16″ diameter, 10-12″ long
  • Tool for installing the plastic shields
  • Hammer
  • Sledge hammer (for final adjustment)
  • 11/16″ drive socket with an extension and power tool
  • Street broom
  • Utility knife
  • Crow bars, gooseneck wrecking bars
  • Portable blower for cleaning installation holes
  • Gloves, safety glasses, traffic cones, drums or barricades for securing the site
Crew
2-4 installers (depending on the solution installed)
Installations Instructions
Step 1. 

Determine the location of the Safety Rider® mini hump and sweep the surface clean of debris / dust. Use chalk to mark the center lines (parallel and perpendicular to the direction of the street) and border lines on the surface.

Step 2.

Assemble and position the units, starting from the center line (parallel to the direction of the street).

Note: Make sure the units are tight and well aligned before moving on to step 3.

Step 3.

Drill 9/16″ diameter holes into the surface, through the existing holes of the placed units. The holes should be 3 1/2″ – 4″ deep in order to accommodate the plastic shields that are 3″ long. After each hole is drilled, insert a plastic shield in order to keep the units from shifting.

Note: Make sure the holes are clear of dust and debris before installing the shields. (A portable blower is useful for this purpose)

Step 4.

Insert the bolts and steel washers into the product installation holes and tighten every element. Do not over tighten.

Maintenance
Mini Humps require minimal maintenance. Periodically inspect the bolts and tighten if necessary.

Reviews

There are no reviews yet.

Only logged in customers who have purchased this product may leave a review.